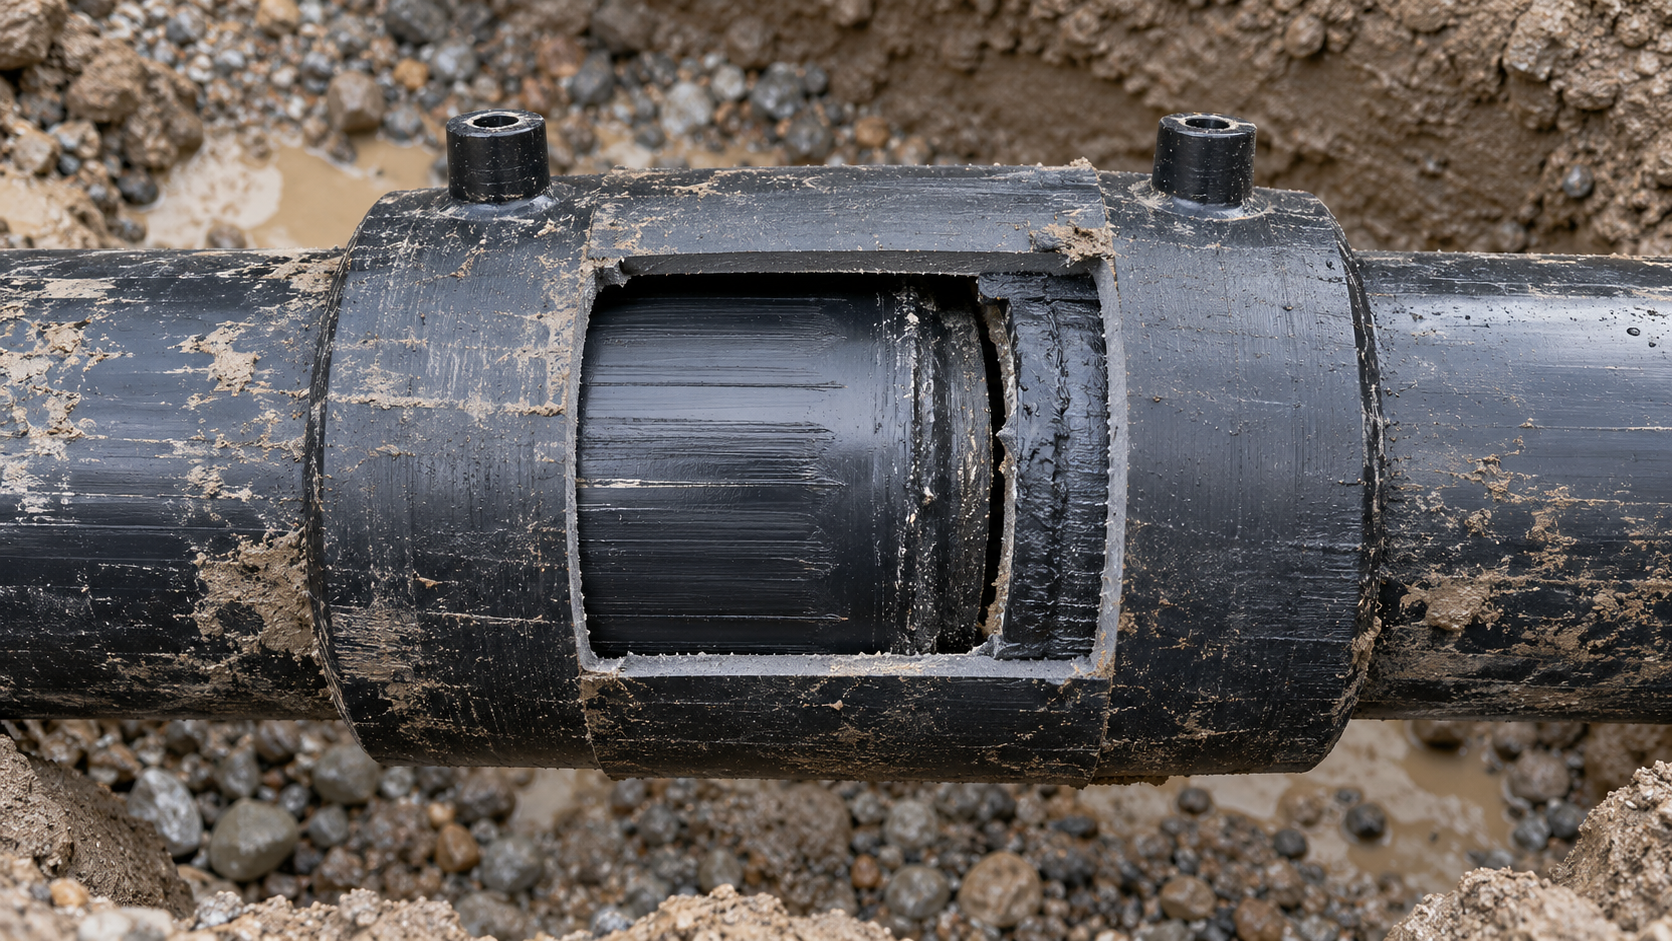
Electrofusion can produce strong, consistent joints in polyethylene pipe systems, but the process is unforgiving of poor preparation. A control box may complete its cycle without reporting an error even though contamination, movement or inadequate scraping has already compromised the joint.
For site teams, the important lesson is simple: joint quality is largely determined before the start button is pressed. Correct pipe and fitting selection, controlled preparation, secure clamping and complete traceability all matter.
This guide examines ten common causes of electrofusion joint failure and the practical controls that help prevent them. It is general guidance only. Always follow the fitting manufacturer’s instructions, the approved jointing procedure, the project specification and the requirements applicable to the work.
1. The pipe surface was not scraped correctly
Polyethylene develops an oxidised surface layer that must be removed from the complete fusion area. If it remains, it can prevent the fitting and pipe from fusing correctly.
Problems arise when an operative:
- misses part of the pipe circumference;
- scrapes too short an area;
- removes material unevenly;
- uses a blunt, damaged or unsuitable scraper; or
- relies on abrasion rather than an approved mechanical preparation method.
How to prevent it: Mark the required preparation area and use a correctly maintained rotary or mechanical scraper suited to the pipe diameter and fitting. Check the prepared surface all the way around the pipe. Follow the fitting manufacturer’s specified preparation method and permissible scraping limits.
2. The prepared surface was contaminated
Mud, dust, grease, drilling fluid, moisture and skin contact can all contaminate the fusion zone. A pipe can also be re-contaminated after it has been prepared—for example, by being placed on the ground or touched while the fitting is positioned.
Dirty gloves and reused wipes are frequent hidden sources of contamination. Wiping from an uncleaned area into the prepared zone can simply spread dirt onto the surface that matters most.
How to prevent it: Establish a clean working area before scraping. Remove heavy contamination first, then prepare and clean the pipe in the sequence specified by the manufacturer. Use suitable lint-free materials and an approved cleaning agent where required. Do not touch the prepared pipe surface or the fitting’s fusion zone.
3. Water entered the fusion area
Rain, condensation, standing water and water running along a pipe can interfere with preparation and fusion. Trying to dry the visible joint at the last moment does not necessarily remove moisture trapped beneath or behind the fitting.
How to prevent it: Carry out fusion work inside a suitable enclosure that protects the operation from rain, wind and dust. Control water before preparing the pipe, keep pipe ends and fittings dry, and do not begin the cycle until site conditions meet the approved procedure.
4. The pipe was oval or out of tolerance
Coiled pipe, storage conditions and installation loads can leave pipe ends oval rather than round. Excessive ovality can create an uneven annular gap between the pipe and fitting, disturb heat transfer and make full insertion difficult.
For coiled pipe in particular, forcing an electrofusion coupler onto an out-of-round pipe is not an acceptable correction.
How to prevent it: Measure and inspect the jointing area. Use the specified re-rounding equipment where required, and confirm that the pipe and fitting dimensions are compatible. Escalate pipe that cannot be brought within the applicable tolerances rather than attempting to weld it.
5. The pipe was not inserted to the correct depth
A coupler is designed around a defined fusion zone. If a pipe is inserted too little, inserted at an angle or moves away from the centre stop, part of that zone may not engage the pipe as intended. Over-scraping the insertion mark can also remove the visual reference needed by the installer.
How to prevent it: Cut the pipe square, remove permitted burrs as instructed, measure the required insertion depth and mark it clearly before assembly. Once the fitting is positioned, confirm that the insertion marks are still at the correct location on both pipe ends.
6. The assembly was poorly aligned or inadequately clamped
Electrofusion fittings should not be used to pull misaligned pipework into position. Bending stress, pipe coil memory and unsupported fittings can create movement or uneven loading during fusion and cooling.
Even small movement while the polyethylene is molten can affect the joint interface.
How to prevent it: Align and support the pipework before fitting assembly. Use clamps of the correct type and size to hold insertion depth, alignment and re-rounding where applicable. The completed assembly should sit without the fitting being used as a structural restraint.
7. The wrong fusion parameters were used
Electrofusion fittings require the correct voltage and fusion time, normally supplied through the fitting barcode or another manufacturer-approved input method. Scanning the wrong label, entering data manually without proper verification or using an incompatible control unit can result in the wrong energy being applied.
How to prevent it: Confirm the fitting identity, diameter, barcode and displayed parameters before starting. Use a compatible, currently calibrated control box. If manual entry is permitted, apply the additional checks required by the manufacturer and project procedure. Never guess an unreadable barcode value.
8. The power supply was unstable or unsuitable
Long or undersized extension leads, an inadequately rated generator, poor connections and voltage fluctuations can interrupt a weld or prevent the control unit from delivering the required energy. Some faults will produce a machine error; others may require closer investigation of the weld record and site setup.
How to prevent it: Match the generator and leads to the control box manufacturer’s requirements. Inspect cables and terminals, minimise avoidable voltage drop and keep electrical connections protected from site conditions. Treat an interrupted or error-flagged cycle as a suspect joint and follow the approved non-conformance process.
9. The joint was disturbed before cooling was complete
The fusion cycle ending does not mean the joint is ready to be moved, unclamped, tapped or pressurised. The molten interface needs the full specified cooling time to develop strength. Removing clamps early or loading the pipe can damage a joint that initially appeared satisfactory.
How to prevent it: Record the required cooling time before starting and keep the assembly clamped and undisturbed for the full period specified for that fitting and the prevailing conditions. Do not confuse minimum clamp-removal time with the time before pressure, handling or tapping; follow the manufacturer’s instructions for each stage.
10. Equipment, competence or records were inadequate
A machine completing a cycle does not prove that the jointing process was controlled. Out-of-calibration equipment, worn preparation tools, expired competence records or missing weld data all weaken quality assurance and make a suspected failure harder to investigate.
Uisce Éireann’s 2025 Water and Wastewater Infrastructure Codes require trained and experienced jointing personnel, six-monthly calibration of fusion equipment, automatic or pre-approved electrofusion machines, and detailed joint traceability for work within their scope.
How to prevent it: Check operator certification, machine identification and calibration before mobilisation. Inspect scrapers, clamps, leads and barcode readers. Agree the joint-numbering system in advance and connect each physical joint to its machine log, location, photograph and as-constructed record.
A successful machine cycle is not the same as a verified joint
The control box monitors electrical conditions during fusion. It cannot confirm that every preparation step was completed correctly. It may not detect an inadequately scraped pipe, contamination, partial insertion or a clamp removed too early.
Joint acceptance therefore depends on the complete controlled process:
- Correct, compatible materials
- A trained and authorised operator
- Suitable, calibrated equipment
- Proper pipe preparation
- Clean and protected fusion surfaces
- Correct insertion, alignment and clamping
- Verified fusion parameters
- Full cooling time
- Inspection, identification and traceability
- Required testing and project QA records
What should you do with a suspect electrofusion joint?
Stop and protect the work. Do not pressurise, tap, bury or place a suspect joint into service merely because the machine reached the end of its cycle.
Record the joint number, fitting, pipe, operator, machine, weld data, location, conditions and observed problem. Quarantine the affected joint and escalate it through the project’s approved non-conformance process. The designer, Field Engineer or other authorised project representative should determine the required inspection, testing, removal and replacement action under the applicable specification.
Do not simply run another fusion cycle unless the fitting manufacturer and approved procedure explicitly permit it. Additional heating can damage the fitting or pipe and may erase useful evidence about the original problem.
On Uisce Éireann projects within the scope of the 2025 Codes, a failed weld can trigger testing of adjacent welds and may extend the replacement requirement to other joints produced by the same machine and crew since the last verifiable compliant test. The crew and equipment may also be prevented from continuing until further audit requirements are satisfied. Accurate traceability limits uncertainty when a failure is investigated.
Electrofusion pre-start checklist
Before pressing start, confirm:
- The pipe and fitting are correct, compatible and undamaged.
- The applicable jointing procedure and manufacturer instructions are available.
- The operator holds the required current certification.
- The fusion control box has current calibration evidence.
- The shelter protects the work from rain, wind and dust.
- The pipe is cut, measured and marked correctly.
- Ovality has been checked and controlled where required.
- The full fusion area has been scraped with a suitable tool.
- Prepared surfaces are clean, dry and untouched.
- Insertion depth and alignment marks are correct.
- The assembly is properly clamped and supported.
- The displayed fitting and fusion parameters have been verified.
- The power supply and leads suit the equipment.
- The cooling period is known and can be observed.
- Joint identification, photographs and weld records can be captured.
Prevention costs less than investigation
Most electrofusion failures are not caused by one dramatic event. They arise from small losses of control: a missed strip of pipe surface, a dirty glove, an unsupported pipe end or a clamp released a few minutes early.
A repeatable method, suitable tooling and disciplined record-keeping make those errors less likely. They also give the project team reliable evidence if a joint is questioned later.
egeplast Ireland supplies electrofusion fittings, calibrated fusion equipment, pipe-preparation and clamping tools, and practical electrofusion training from its Waterford technical centre. Speak to the team before mobilisation to coordinate the materials, equipment and operator requirements for your project.
Frequently asked questions
Can an electrofusion joint pass the machine cycle and still be defective?
Yes. The control box checks electrical aspects of the fusion cycle, but it cannot verify every preparation step. Contamination, inadequate scraping, incorrect insertion or movement during cooling may not generate a machine error.
Can an electrofusion fitting be welded twice?
Do not re-energise a fitting unless its manufacturer and the approved project procedure expressly allow it. A stopped, interrupted or suspect weld should be quarantined and assessed through the applicable non-conformance process.
Why must PE pipe be scraped before electrofusion?
Scraping removes the oxidised outer layer and prepares a consistent surface for fusion. The complete fusion area must be prepared using the specified method and suitable tooling.
How long should an electrofusion joint cool?
Cooling time depends on the fitting, size, system and manufacturer. Use the time shown on the fitting or in the current manufacturer instructions. Keep the joint clamped and unloaded for the full applicable period.
Is a visual inspection enough to approve an electrofusion joint?
No. Visual checks are useful, but joint assurance also depends on the controlled installation process, machine record, operator competence, traceability and any testing required by the project specification.
Sources and technical note
- Uisce Éireann, Water Infrastructure Code of Practice, CDS-5020-03, Revision 3 (2025)
- Uisce Éireann, Wastewater Infrastructure Code of Practice, CDS-5030-03, Revision 3 (2025)
- GF Industry and Infrastructure Flow Solutions, Electrofusion Installation and Training Manual
Technical note: This article is general guidance and is not a jointing procedure, method statement or substitute for the complete Uisce Éireann Codes, project specification, applicable standards or manufacturer instructions. Check the fitting and fusion-equipment manufacturer’s current instructions for the actual system being installed.